May 24,2022
How to Build a Ground-Level Deck
by David Stewart
Imagine waking up before the rest of your family on a warm summer morning, and starting your day by sipping coffee on your brand-new deck. Building a deck can be beneficial whether you are looking to enjoy peaceful outdoor moments or planning to entertain family and friends.
DIY Deck Building Basics
An easy way to expand your outdoor living space is by building a 120 x 93-inch square ground-level platform deck. Since it won’t be attached to your home, it can be built anywhere in your backyard. This simpler DIY route will still give you plenty of room for your grill, chairs and potted plants, without the added expense and planning of an attached deck.
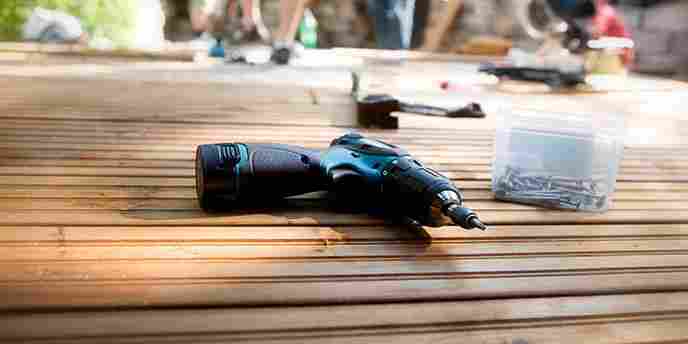
Supplies and Tools for Building a Deck:
If the bottom of your deck frame will be less than 6 inches above the ground or partially buried, you should use pressure-treated wood that is rated for ground contact.
Cost of Building a Deck
Since you are building a freestanding deck that is not attached to your home, the cost can be significantly lower. According to HomeAdvisor , an attached deck will run you about $7,413. Depending on the size you decide on and what tools you already own , a freestanding platform deck will cost about $1,200-$1,500. You can check your local home improvement stores to rent the above tools if you don’t want to purchase your own.
Keep in mind that extra features you add such as built-in benches, planters or shade structures can add an additional cost per square foot.
Preparing to Build Your Own Deck
Planning is key before starting any type of DIY project. If you have an existing wood deck that has seen better days, you will need to tear it down and dispose of the debris before starting this job. A few additional deck building tips to keep in mind before you start this project include:
“Double check with local authorities to find out what their height restrictions are for freestanding decks because they vary considerably.” Rich Bergman | DecksGo

How to Build a Deck in 8 Steps
This guide will take you through how to build a deck step by step to create a 120 x 93-inch square platform deck. If you want to add extra space or add-ons such as an outdoor fireplace, stairs or a ramp, you can still follow these steps to get started.
1. Prepare the Area
Start by removing grass from the area that your deck will be built on. Rake the ground so it’s level and smooth before laying your landscape fabric and gravel. This will help control moisture and keep weeds from growing up under your deck. Have a lot of yard waste to get rid of? Learn how to dispose of your landscaping debris .
“Remove sod and any organic material. Also, remove any loose top soil to expose the undisturbed soil. Test your soil in advance to make sure it isn’t full of rocks or tree roots.” Rich Bergman | DecksGo
2. Set Concrete Blocks
Create seven rows of three concrete blocks. Space the corner blocks to be 10 feet apart on the long sides and 8 feet apart along the short sides. Use your level and one of the 10-foot boards to make sure the remaining blocks are equally spaced between the corner ones.
3. Lay the Deck Frame
This step can be done on a flat area of your lawn, in the driveway or on top of your concrete blocks. Start with your seven 2×6 boards, and use your circular saw to cut each board to be 93 inches long. These will be your standard joists.
Next, take your two 2×6 10-foot boards and ensure they are exactly 120 inches (10 feet) long. These will be your end joists. Put the two end joists over the ends of two of the standard joists to create a 96-inch by 120-inch rectangle.
Using your cordless drill, attach the pieces with three 3 1/2-inch deck screws at each corner. From the inside of one corner of the frame, measure and make a mark every 19 ½-inches along one of the 10-foot end joists. Repeat on the other end joist.
“I recommend adding one extra footing along the central beams. That is because the zones in the middle of the deck always carry more load than the perimeter zones.” Rich Bergman | DecksGo
4. Attach Standard Joists
Lay a standard joist so it is centered on each pair of lines and the tops of the joists are flush. Drill pilot holes, and fasten through the end joist into the standard joist, securing them with three 3 1/2-inch screws at each end.
5. Place the Deck Frame
The next step in building your deck is to position the frame onto the concrete blocks so the frame rests over the centers of each block. Use your framing square and check the corners to confirm they’re at 90-degree angles. Grab someone to help you square up the frame by pushing diagonally from opposite corners. Make sure your frame is totally square.
6. Adjust Concrete Block Height
Check that each concrete block is level and makes full contact with the deck frame. Add, remove or smooth out the gravel beneath the blocks to change their height if they are not level.
7. Install Deck Boards
Place one 10-foot deck board along one long side of the deck frame so it is flush with the outside face of the end joist. Drill holes to align with each standard joist, with one hole in the end joist and one in the standard. Using 2 ½-inch deck screws, secure the deck boards to each joist.
Install the next 10-foot board using two screws in each standard joist. Make sure you are spacing the boards out so they are about ¼-inch apart. Use the same technique for the remaining deck boards, making sure to space them apart evenly, which will help with water drainage.
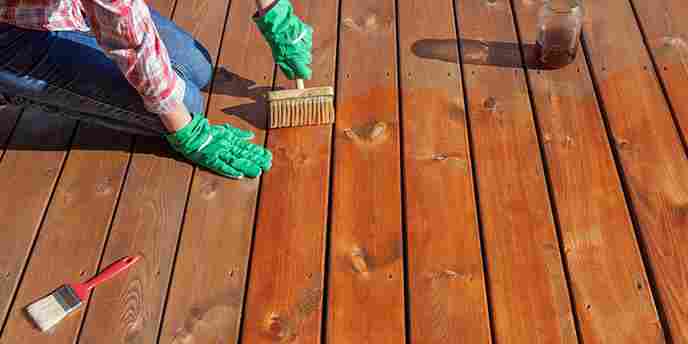
8. Seal Your Deck
Depending on what type of lumber you chose to build your platform deck, you will likely need to apply a protective stain or sealant once your wood is dry. If your deck is left unfinished, the wood can begin to crack and splinter. The most common lumber options used for decking are cedar, redwood and pressure treated wood. Make sure to implement a yearly deck maintenance strategy to make sure your hard work doesn’t go to waste.
Get Outside and Enjoy Your New Deck
Need additional ways to get your home and yard ready for the warm weather? These posts are a great place to start: