May 26,2022
How to Remove a Tile Floor: A Step-By-Step Guide
by David Stewart
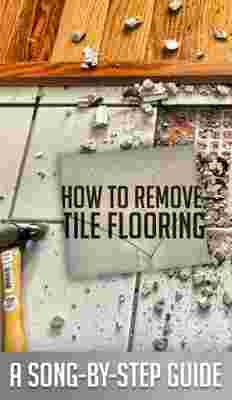
ck out this step-by-step guide on How to Remove Tile Flooring. A great winter home improvement project!
There are plenty of reasons that you may need to remove your tile floor. Perhaps it cracked when you were moving your refrigerator. Or maybe it’s a bit too slick when you’re getting out of the shower. Or possibly you just want a change.
So, what’s the best way to remove a tile floor? We’ll show you how it’s done in five easy steps — but first, here are a few things to keep in mind before you get started.
Preparing for a Tile Floor Removal
Cost to Remove a Tile Floor
The cost to remove a tile floor depends on a number of factors including the size of the room and whether you’re looking at a DIY tile removal or hiring a contractor. Homewyse has a handy tile removal calculator that will give you a general guideline on costs, but keep in mind the price given will be with a contractor doing the work. If you pull up the tile yourself, your costs will be kept to the tools used and the tile disposal.
While the project itself is relatively easy and simple, it will be quite time consuming and physically strenuous. The added difficultly comes with the rooms you’re working on, and what may need to be uninstalled or removed from the area — but more on that later.
Tools to Remove Tile Flooring
Exactly what tools are needed to remove tile? There are plenty out there that you can use, whether they are power or hand tools, and each job will require a different assortment. Here’s a quick list of tools that are almost always needed:
Pro Tip: Don’t Forget to Protect Yourself
Just as important as having the proper tools for the job is having the proper gear to keep yourself safe. Tile can be extremely sharp when broken, so long-sleeved shirts and pants are suggested. Gloves and safety goggles should be worn at all times, even through the cleanup phase. Finally, a safety mask is also a must. The tiles will create a lot of dust that you don’t want to be breathing in.
Should I Remove Asbestos Tile Myself?
No.
Removing tile flooring is a relatively safe project, unless you’re dealing with asbestos floor tiles or adhesives.
Daniel King, from The Mesothelioma Center at Asbestos.com , says that while these types of tiles are not dangerous while intact, the danger lies when they are removed.
“Asbestos is dangerous when it gets into the air as dust,” King says. “In many cases, the best thing to do it put a new layer of flooring on top of it or seal it with a coat of epoxy floor paint. Both these options will keep asbestos fibers trapped.”
King also notes that while vinyl flooring tends to be the most at-risk of containing asbestos, it is possible that the glue holding the tiles in place may contain asbestos.
“It is safest to assume any vinyl flooring material put down before 1980 contains asbestos. You can’t tell whether a product has asbestos just by looking at it — unless it happens to have a manufacturer’s label on it that says ‘contains asbestos’ or ‘asbestos-free.’”

Daniel King | The Mesothelioma Center at Asbestos.com
King suggests having an asbestos abatement professional inspect any floors you are unsure of. He also says that a sample of the material could be sent to a lab for testing, but that you need to exercise caution while getting the sample to avoid breathing in any dust.
“I always recommend leaving asbestos removal to professionals,” King says.
Removing a Tile Floor in Five Steps
1. Prepare the Area
Before you dive right in and start pulling up tiles, you need to get your rooms ready for work. This is a fairly quick process that will help set you up for success while ensuring you don’t ruin your possessions.
Additionally, Robert Robillard of A Concord Carpenter, LLC , says that having space is key when it comes to removing tiles. In other words, anything that can be removed should be, even if it requires a bit more effort, because it will save you time in the long run.
“Trying to work in a bathroom without removing the vanity or something like that is always difficult,” Robillard says. “It’s easiest when the entire room can be cleaned out and give you more room.”
2. Create a Starting Point
You’ve got to start somewhere, but that doesn’t mean it has to be tough. According to Robillard, host of the Boston-area DIY TV show “A Concord Carpenter”, the rule of thumb here is to try and find a place where tile may already be nonexistent, like under a vanity or another fixture. Another great place to start is a spot where the old tile may be loose or cracked, which will allow you to pull up the tile much easier.
Unfortunately, these types of spots are not always there, and you’ll have to create your own starting point. If that’s the case, a corner of the room or doorway where the tile does not continue into the next room is usually the best place to start.
“You want to look for an edge. Sometimes that is where you got rid of a vanity. Sometimes it’s a threshold… pop the threshold off and you have a clean edge. Basically, the best place is if you can find an area where there is a clean edge. You want to look for an area where you can peel it up.”
Robert Robillard | A Concord Carpenter
The Best Way to Start Removing Tile
Once you’ve picked your starting spot, here’s how to get started:
3. Continue Removing Old Tile
This is where the real work begins. When to start it, though, will vary from person to person. Once you have removed enough tile to comfortably use either your long-handled floor scraper or air hammer with a chisel set, it’s time to get the bulk of the work done.
Use your tools to get underneath a tile and pry it away from the underlayment. Don’t worry if the old tiles break — some will come up easier than others, but all of it will be getting tossed.
As you’re working remember:
4. Inspect the Underlayment
Now that the tiles are all removed, it’s time to take a look at what’s underneath. Typically, you’ll find a layer of underlayment – material that sits between your subfloor and your finished flooring. But if you’re working in your basement or an older home, you may find that the tile was installed directly to a concrete or wood floor.
If you find a plywood underlayment and you plan on installing new tile, Robillard suggest replacing it with a more stable and sturdy material. “Plywood really isn’t the best underlayment for tile,” Robillard says. “[Q]uarter-inch and half-inch cement board and underlayment board is going to be a much better underlayment than a plywood board.”
The main reason that plywood is no longer considered the best underlayment for tiles is because it is absorbent and will expand with moisture, which can cause a ridged material like tile to crack. However, for flooring types like vinyl or linoleum, plywood is still a fine underlayment.
If the plywood underlayment and subfloor panels are in good shape , you can reuse it if you’re installing other flooring materials. When reusing existing underlayment or removing tile from a wood or concrete floor, it’s important to know how to remove floor tile adhesive properly.
How to Remove Floor Tile Adhesive
Pro tip: Be sure to keep the area well ventilated by opening windows or using a fan.
Removing the Underlayment
If the underlayment is water damaged or torn up after removing adhesive, it may be time to remove it:
Important safety tip: There will be a lot of nails in the underlayment, so be careful as you pick up the pieces to throw out.
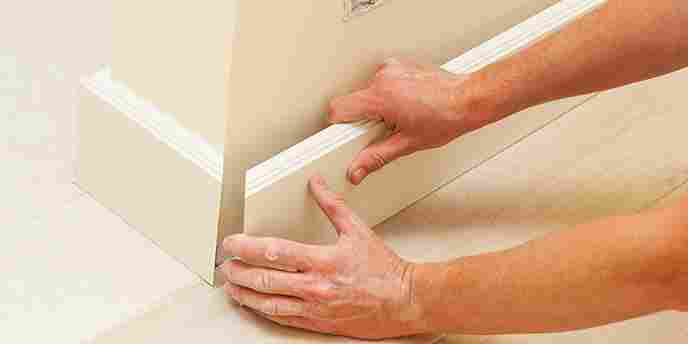
If you decide to remove the underlayment, you’ll need to replace it before you install a new floor. Each type of flooring will have unique underlayment needs. As a result, the cost, skill level and time commitment will vary based on the floor type you pick. “We always suggest replacing the underlayment,” says Robillard. “You’re redoing the floor, so you might as well make sure the support is good, too.”
5. Time to Clean Up
With either your underlayment or subfloor exposed, it’s time to clean up the mess.
Take your buckets filled with old tile, adhesive and underlayment chunks and throw them out. If your project was larger, consider a dumpster rental for tile disposal, rather than wait for your next bulk trash pickup day.
Use your shop-vac to vacuum up smaller pieces of debris as well as dust. You won’t want to rush this step, as it is one of the most important when it comes to installing your new floor. Any dust that has not been cleaned from underlayment or subfloor will make it harder for a new floor to properly adhere to the surface.
A World of New Flooring Awaits
With the tile removed, the next step is up to you. How will you replace your old tile floor? With plenty of other flooring options available, you can’t go wrong.
Looking for a different type of floor? Hardwood is a solid choice. Our Hardwood Flooring Guide walks you through the different wood options, as well as how to install and maintain it.